Project:
7 ft. Tiered Christmas Village Tree Display Stand Plans (6 Shelves)
Package:
3 CNC Cut Files (SVG, DXF, DWG) + 1 PDF Guide
Laser/CNC-Ready Cut Files with a PDF Production Guide Covering Step-by-Step Assembly, Dimensions and Material Notes
What This Estimate Covers
Plywood Panel
2 sheets of 3/4" (19 mm) hardwood-faced (birch) plywood — this estimate uses the hardwood-faced option, which is cheaper than Baltic birch.
Screws & Hardware
#8 x 1-1/2" wood screws for the center post and shelf-holder joints (220-240 total) — sold in 100-count packs, so you'll need a few.
Adjustable Leveling Feet
4 threaded-stem furniture leveling feet, the type referenced in the guide.
Finish (Varnish/Paint)
Water-based polyurethane varnish (1 quart) for the natural birch look, priced here; a fully painted finish costs differently based on the primer/paint you choose.
LED Strip (Lighting)
Price varies widely by length (30-60 ft range) and product choice, so it's not included in this estimate.
Wall Anchor Hardware (Anti-tip Kit)
An optional safety measure; whether you use one and which kit you pick varies by person, so it's not included.
CNC/Laser Cutting Labor
If you have the cutting done by a shop, labor pricing varies significantly between local providers, so it's not included in this estimate.
Fast processing. Help was offered.
Oct 16, 2025 · Martina B*
I haven't made it yet, but the instructions are clear and easy to read. Will post pictures after it is made. Didn't need customer service. Thank you!
Aug 6, 2025 · Jacquelynn O*
Great design, I'll try to build it as soon as possible.
Nov 13, 2024 · Giuseppe S*
Great plans! Very easy to understand and suggestions are right on!
Oct 31, 2024 · Deborah
Directions are easy to understand.
Feb 3, 2024 · Courtney
Fast processing. Help was offered.
Oct 16, 2025 · Martina B*
I haven't made it yet, but the instructions are clear and easy to read. Will post pictures after it is made. Didn't need customer service. Thank you!
Aug 6, 2025 · Jacquelynn O*
Great design, I'll try to build it as soon as possible.
Nov 13, 2024 · Giuseppe S*
Great plans! Very easy to understand and suggestions are right on!
Oct 31, 2024 · Deborah
Directions are easy to understand.
Feb 3, 2024 · Courtney
I designed this one so you can display a Christmas village collection without giving up the floor space a real tree takes — six circular shelves stacked up a single center post, narrowing as they go, reading as a tree silhouette from across the room.
The tapering isn't only a visual choice: every tier stays open at the front, so you never have to crouch down or lift the tier above to see the houses below. On a real tree, pieces disappear between the branches; here each one sits on its own stage.
It's laid out with collectors of village sets like Dept. 56 and Lemax in mind — but you don't have to display miniature houses. Ornaments, wrapped gifts, candle holders, or small potted plants all sit just as well.
How much room it gives you: The six shelves add up to roughly 24 sq ft (2.2 m²) of display surface — more than most people guess at first glance. Tier by tier:
- Bottom shelf, 40" (101.6 cm): ~8.7 sq ft (0.81 m²) — the main stage for the collection
- 2nd shelf, 34" (86.4 cm): ~6.3 sq ft (0.59 m²)
- 3rd shelf, 28" (71.1 cm): ~4.3 sq ft (0.40 m²)
- 4th shelf, 22" (55.9 cm): ~2.6 sq ft (0.25 m²)
- 5th shelf, 16" (40.6 cm): ~1.4 sq ft (0.13 m²)
- Top shelf, 10" (25.4 cm): ~0.5 sq ft (0.05 m²) — for a single feature piece or a topper
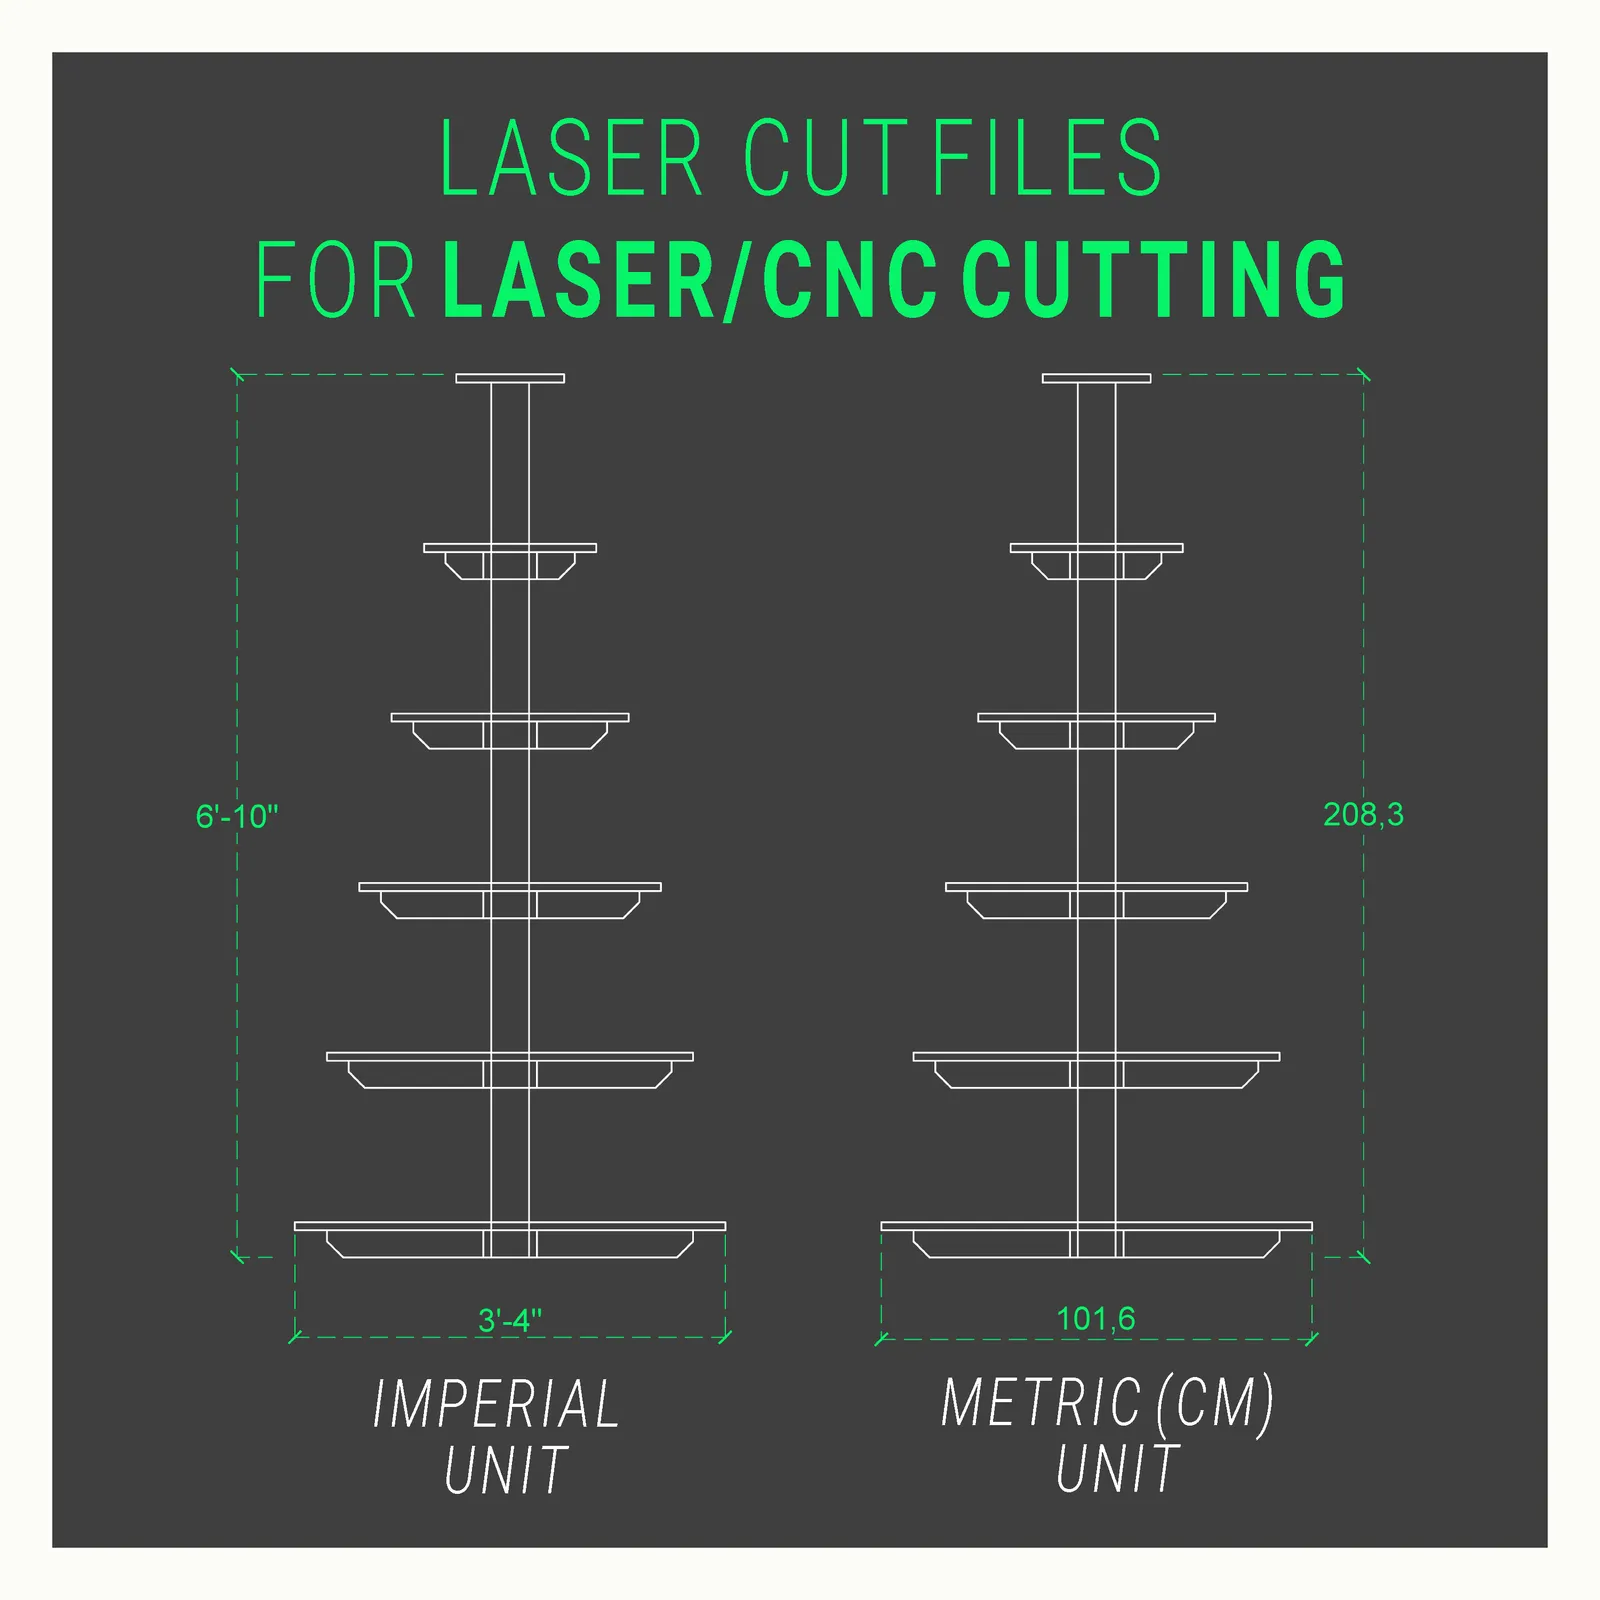
There's 15-3/4" (40 cm) between tiers; once you subtract the panel thickness, that leaves about 15" (38 cm) of usable clearance on each level. That means a church with a bell tower or a tall model tree still fits on the lower tiers — you're not limited to short buildings.
Finished, the structure stands 81-1/4" (about 206 cm) tall, and its widest point is the bottom shelf at 40" (101.6 cm) across. Total height shifts by an inch or so depending on how far out you run the adjustable feet.
Shelf diameters, bottom to top:
- 1st shelf (bottom): 40" (101.6 cm)
- 2nd shelf: 34" (86.4 cm)
- 3rd shelf: 28" (71.1 cm)
- 4th shelf: 22" (55.9 cm)
- 5th shelf: 16" (40.6 cm)
- 6th shelf (top): 10" (25.4 cm)
The shelves sit 15-3/4" (40 cm) apart. The center post is a hollow square column, 3-1/2" × 3-1/2" (8.9 × 8.9 cm) in section.
When you measure the spot you have in mind, remember the base is a 40" (101.6 cm) circle and the stand occupies that circle in every direction — the center of the stand needs to sit at least 20" (51 cm) from the wall, or the bottom shelf's edge will touch it. If you're specifically trying to fit a tight corner, the corner stands in this same category are the better fit.
3 SVG, DWG, and DXF format CNC files: The three files carry the same content — I prepared them in three formats purely for compatibility with different software. You don't need paid software to open them: LibreCAD (free, open-source) and QCAD (free community edition) both run on Windows and Mac. If you want a Windows-only option, Autodesk's own free viewer DWG TrueView is available. That said, if you're having it CNC-cut, you don't need to open the file yourself — just hand it off to whoever's doing the cutting.
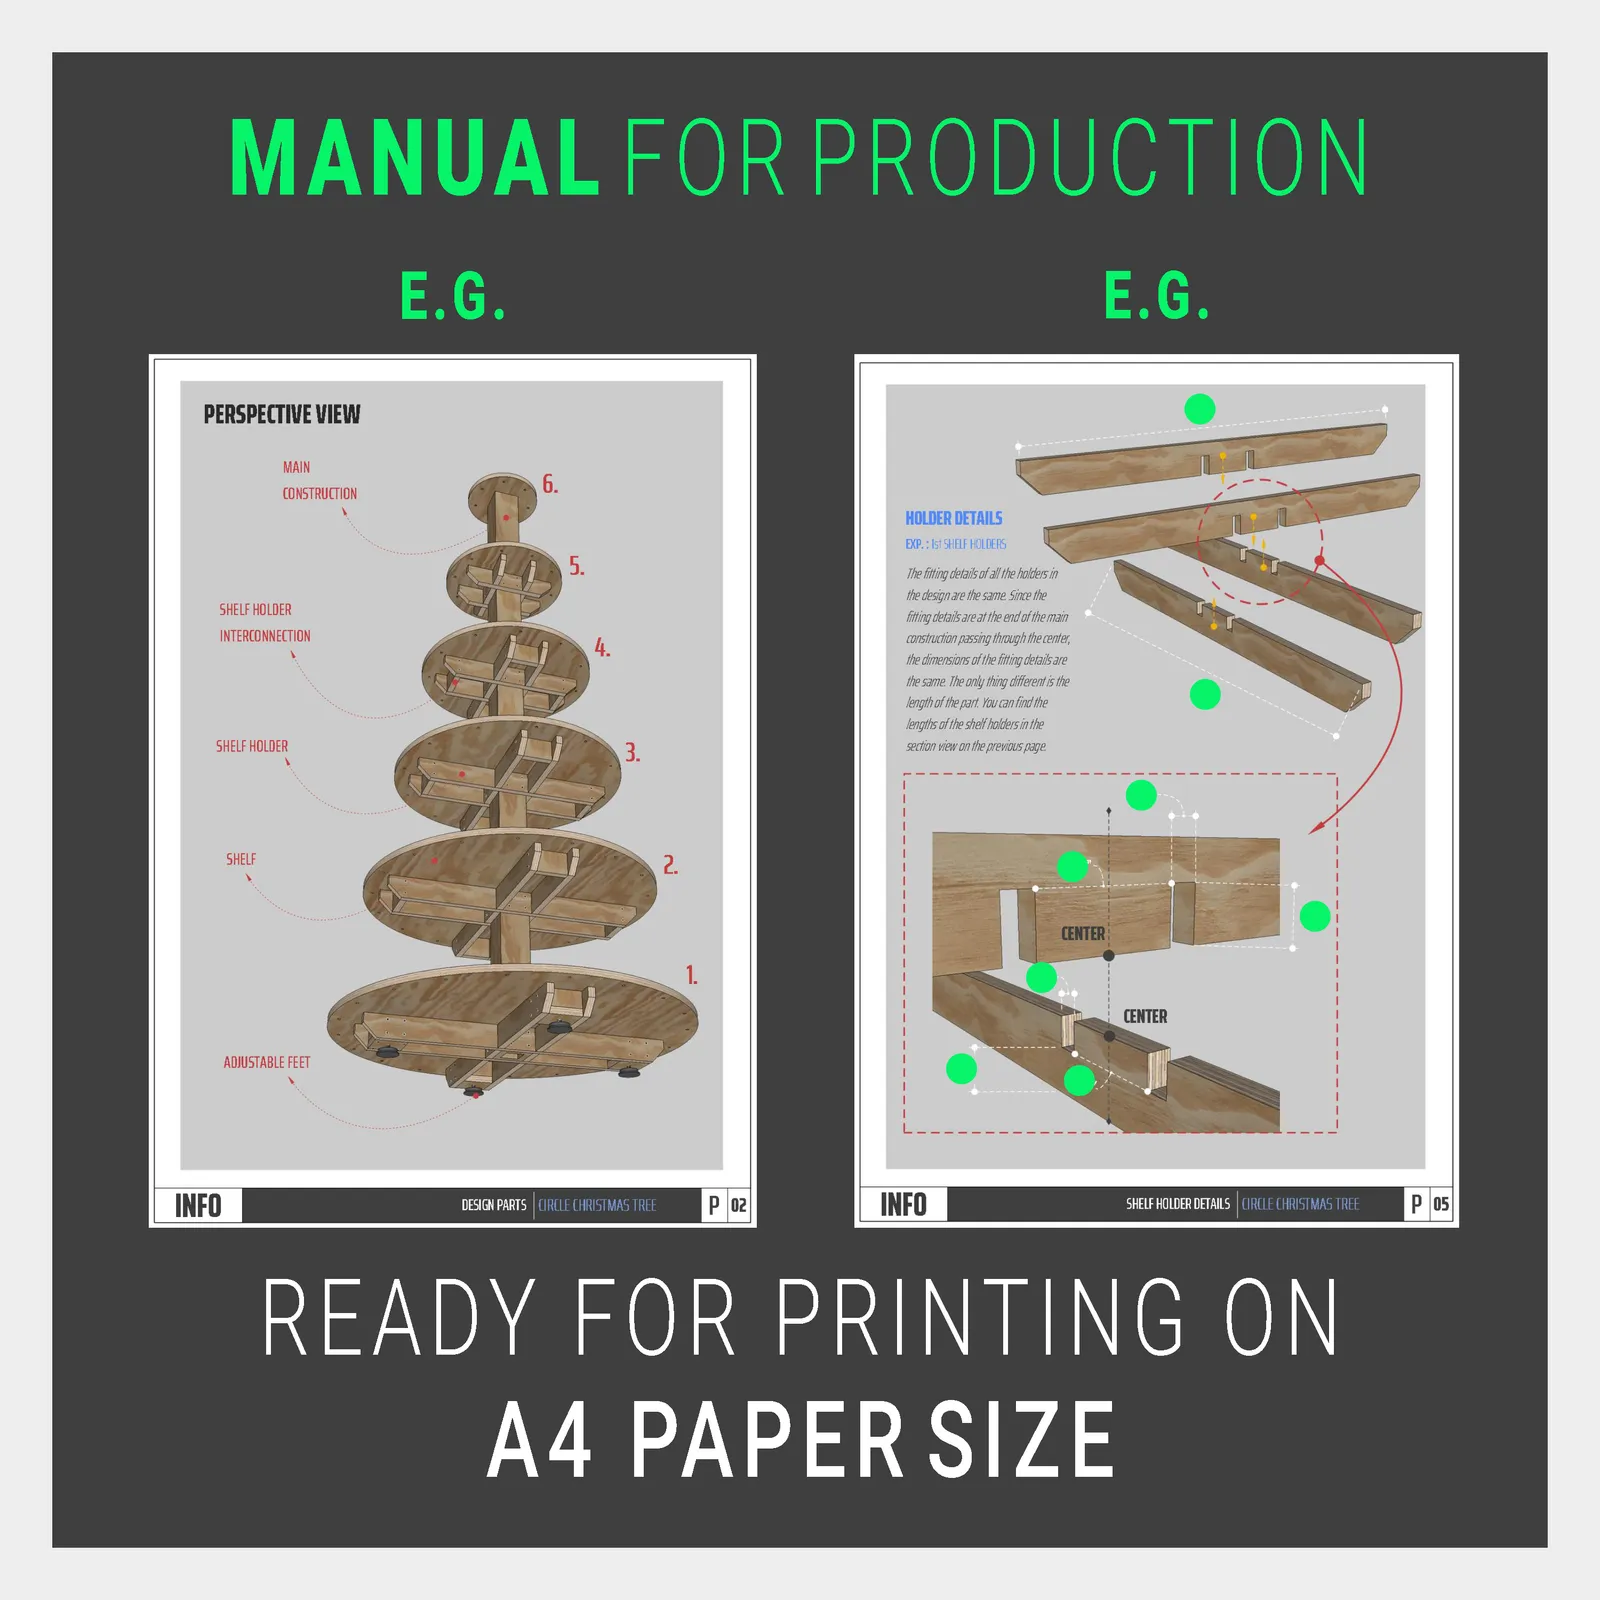
1 PDF format build guide: A 10-page guide, explained through drawings. It covers an exploded parts diagram, a top view of the shelves with the hole details, a side section (shelf heights and holder lengths), the shelf-holder joint detail, the center post's 45° joint detail, the adjustable foot detail, and the full cut list.
You can print the guide at either A4 or A3 — the page layout prints at both sizes with no scaling problems. I prepared it for A3, partly because that ratio is close to a phone screen's, so the plans read comfortably if you'd rather study them on your device. But printing A4 on a home printer costs you nothing: the drawings and dimension text are sized to stay clearly legible at A4 too.
There's no separate printable template file for hand-cutting on this project — and you don't need one. Every part is a circle or a rectangle; the cut list in the guide gives each part's size and quantity, so you can lay them out on the panel directly.
This is an indoor project, so the weather resistance we look for in outdoor panels isn't relevant here — what matters is appearance, weight, and how cleanly the cut edges come out.
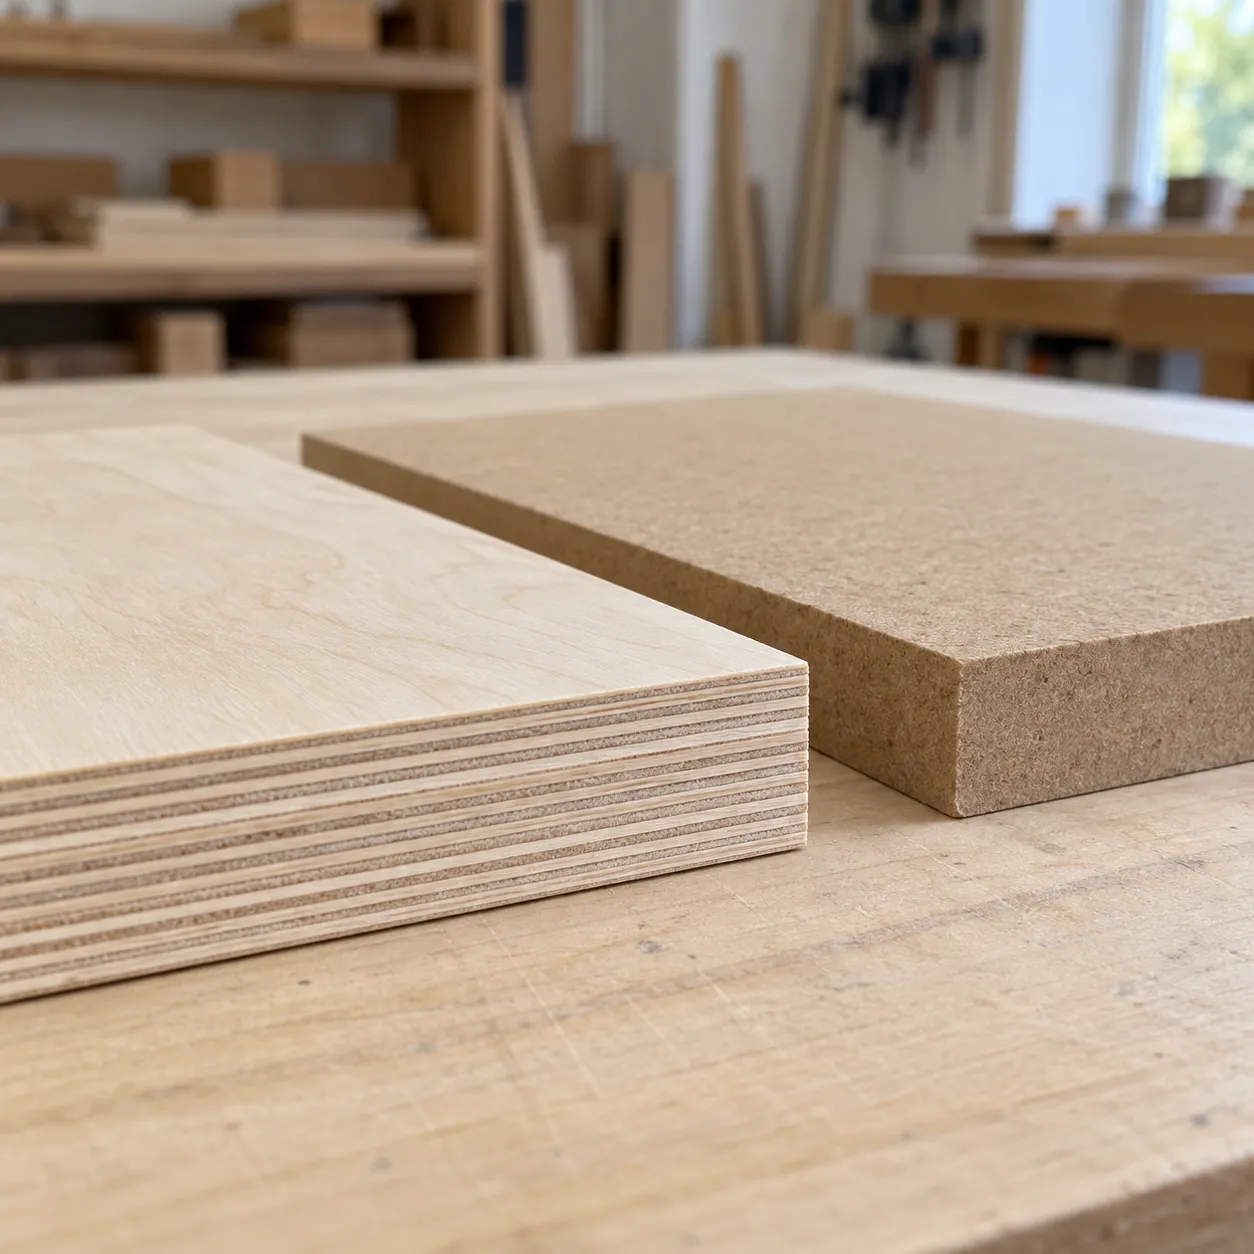
I recommend birch plywood. Its face is smooth and its plies are tight and void-free, so cut edges come out clean. That detail matters on this project, because the shelf edges stay completely exposed, and you can leave the whole thing unpainted if you like the natural look. You'll run into two different products when shopping:
- Baltic birch plywood — also sold as "Russian birch" or "Finnish birch". Every ply is birch and there are no internal voids. Ask for grade B/BB or BB/BB; this is the product that gives the cleanest exposed edge, and the best choice for this project.
- Birch-faced hardwood plywood — only the outer face is birch veneer, with poplar or similar underneath. The product I referenced on the guide's material page, Columbia Forest Products PureBond, is this type (PureBond is the maker's formaldehyde-free — "NAF, no added formaldehyde" — glue technology, not a separate species). The face looks good, but the inner plies show a different color on the cut edge.
MDF works too — full name medium-density fibreboard. It's usually cheaper and its surface takes paint very well, so it's a sensible choice if you're painting everything anyway. Standard (raw) MDF is fine here; you don't need the moisture-resistant grade (MR MDF, dyed green), which is meant for damp rooms. It has two drawbacks: it's noticeably heavier, and it doesn't hold screws as well as plywood, especially near a panel's edge. If you go with MDF, drill pilot holes and avoid driving screws too close to the edges.
The one material I'd steer you away from is cheap construction-grade plywood. You'll see this sold as CDX plywood ("C-D grade", meant for roof and wall sheathing), sheathing plywood, or simply as softwood/construction plywood. The voids in its inner plies look rough on an exposed edge and cause tear-out when you're cutting curves.
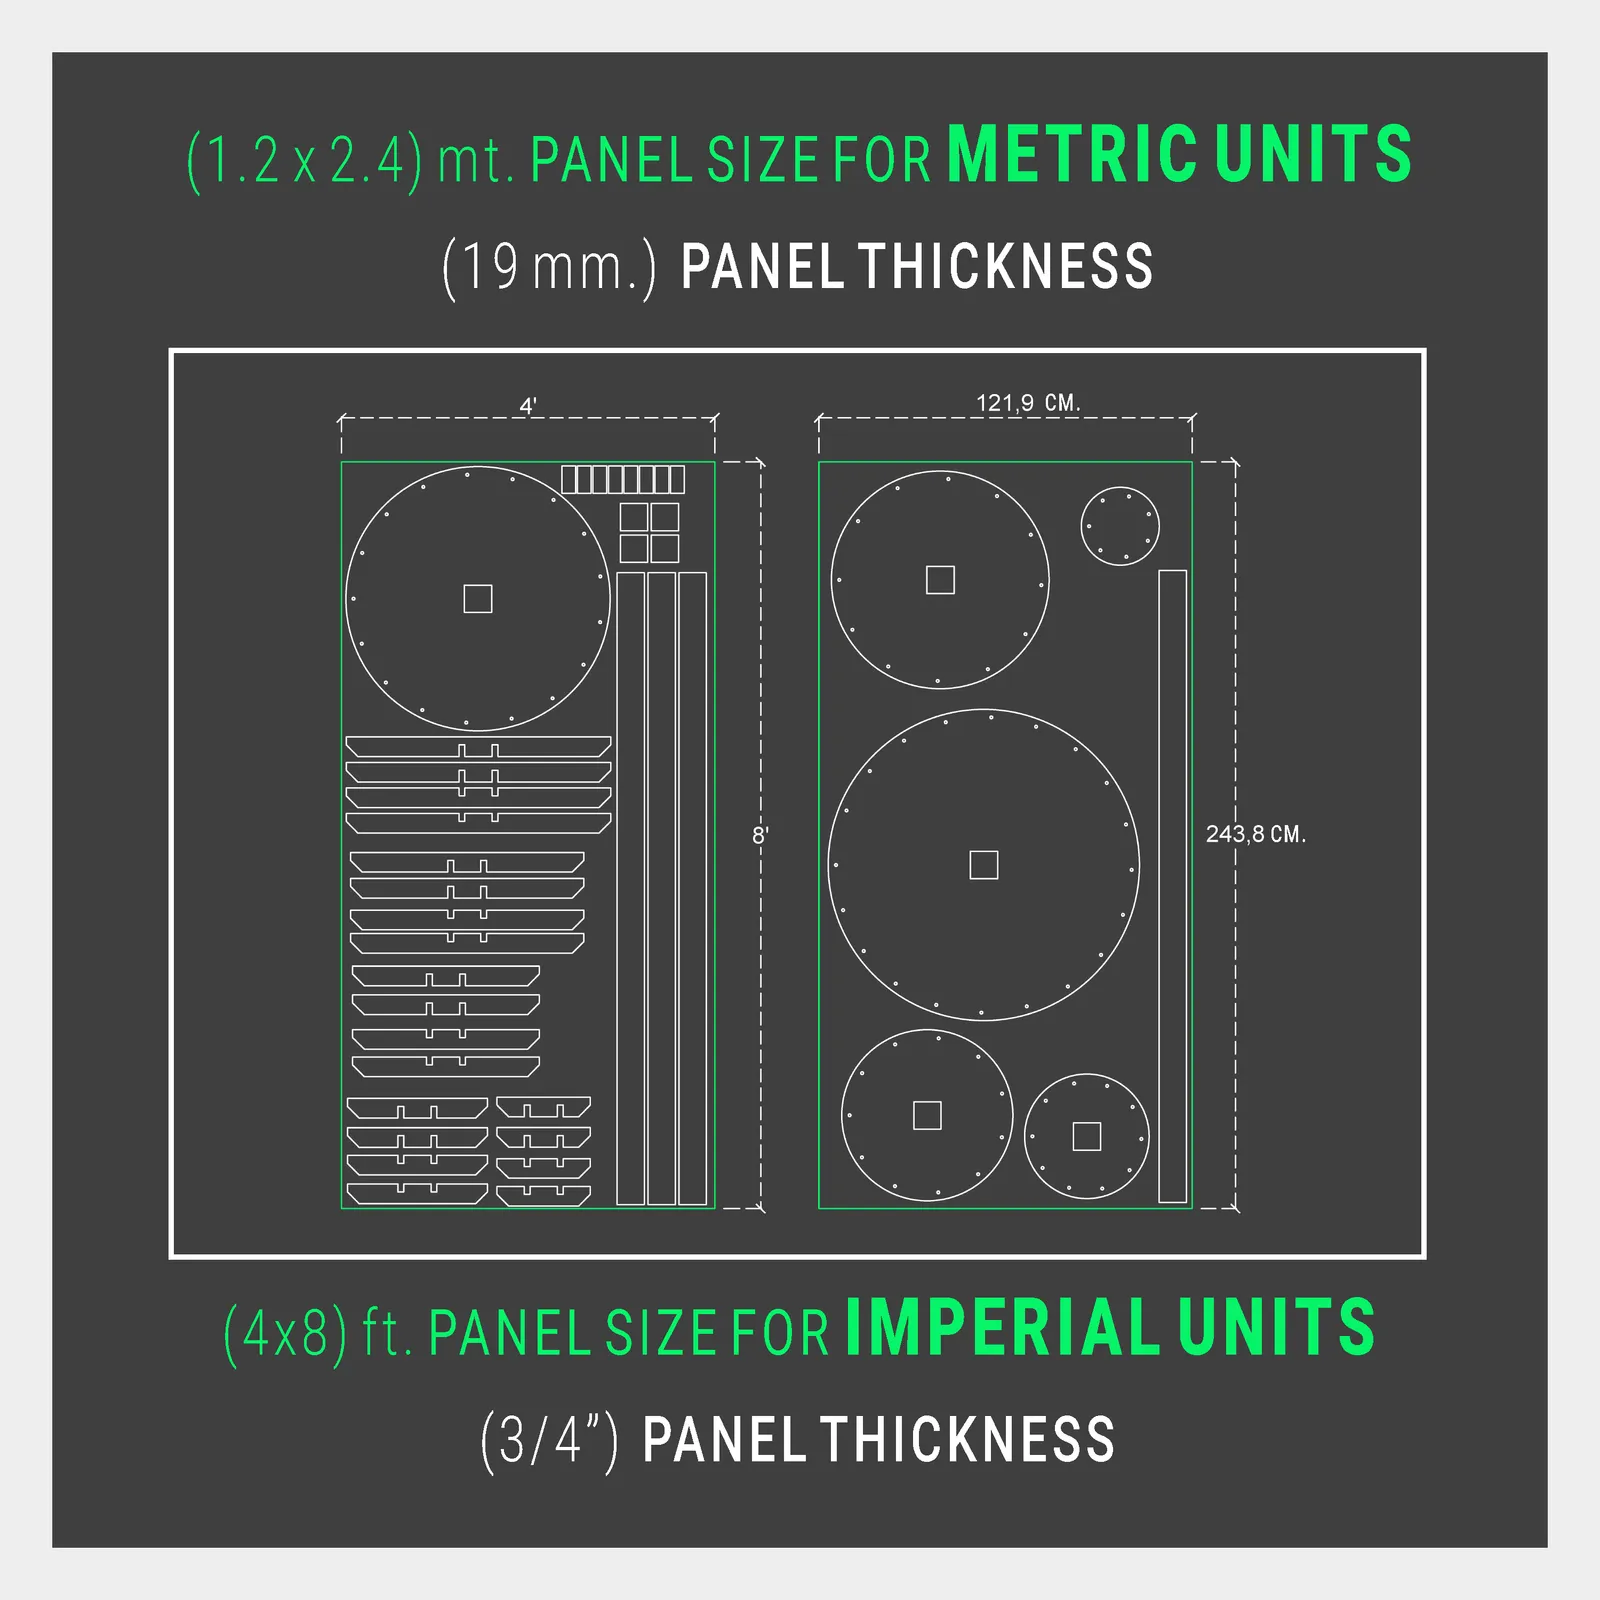
Every part in this project comes out of a single type of material — 3/4" (19 mm) panel — so there's no second thickness to buy. In total, 2 sheets of 4×8 ft (122 × 244 cm) panel is enough.
The cut list:
- Shelves (6): one circle each at 40" (101.6 cm), 34" (86.4 cm), 28" (71.1 cm), 22" (55.9 cm), 16" (40.6 cm), and 10" (25.4 cm) diameter
- Center post (4): 3-1/2" × 81-1/4" (8.9 × 206 cm) strips
- Shelf holders (20): 2-1/2" (6.4 cm) wide — four each at 34" (86.4 cm), 30" (76.2 cm), 24" (61 cm), 18" (45.7 cm), and 12" (30.5 cm) long
- Holder interconnections (12): 2-1/2" × 3-1/2" (6.4 × 8.9 cm)
- Foot parts: 1-3/4" × 3-1/2" (4.5 × 8.9 cm) (8) and 3-1/2" × 3-1/2" (8.9 × 8.9 cm) (4)
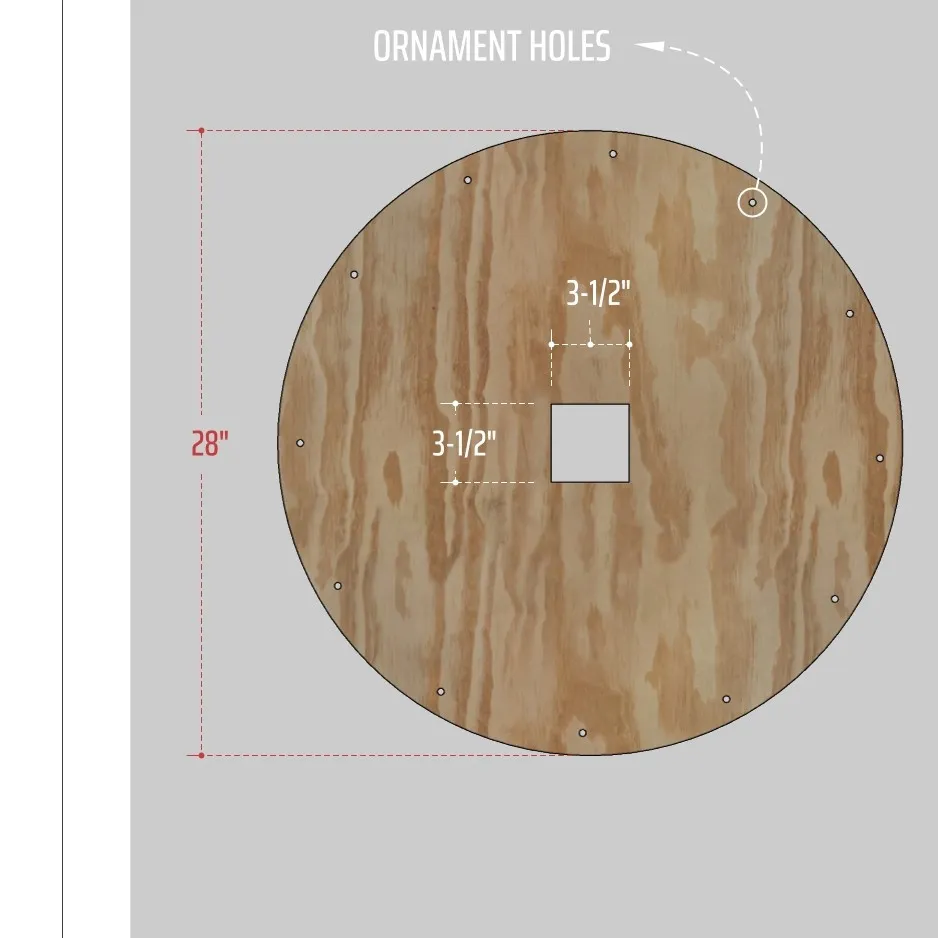
Every shelf except the top one (10" / 25.4 cm) gets a 3-1/2" × 3-1/2" (8.9 × 8.9 cm) square opening cut dead center — that's where the center post passes through. The center of that opening and the center of the circle have to be the same point; if it's off, the shelf sits crooked, and that's one of the most visible mistakes once the structure is finished.
There are also 5/16" (8 mm) holes about 1" (2.5 cm) in from the edge of every shelf. These aren't required — they're there for decorating, and they earn their keep the moment you want to tie on garland, lights, or a hanging ornament.
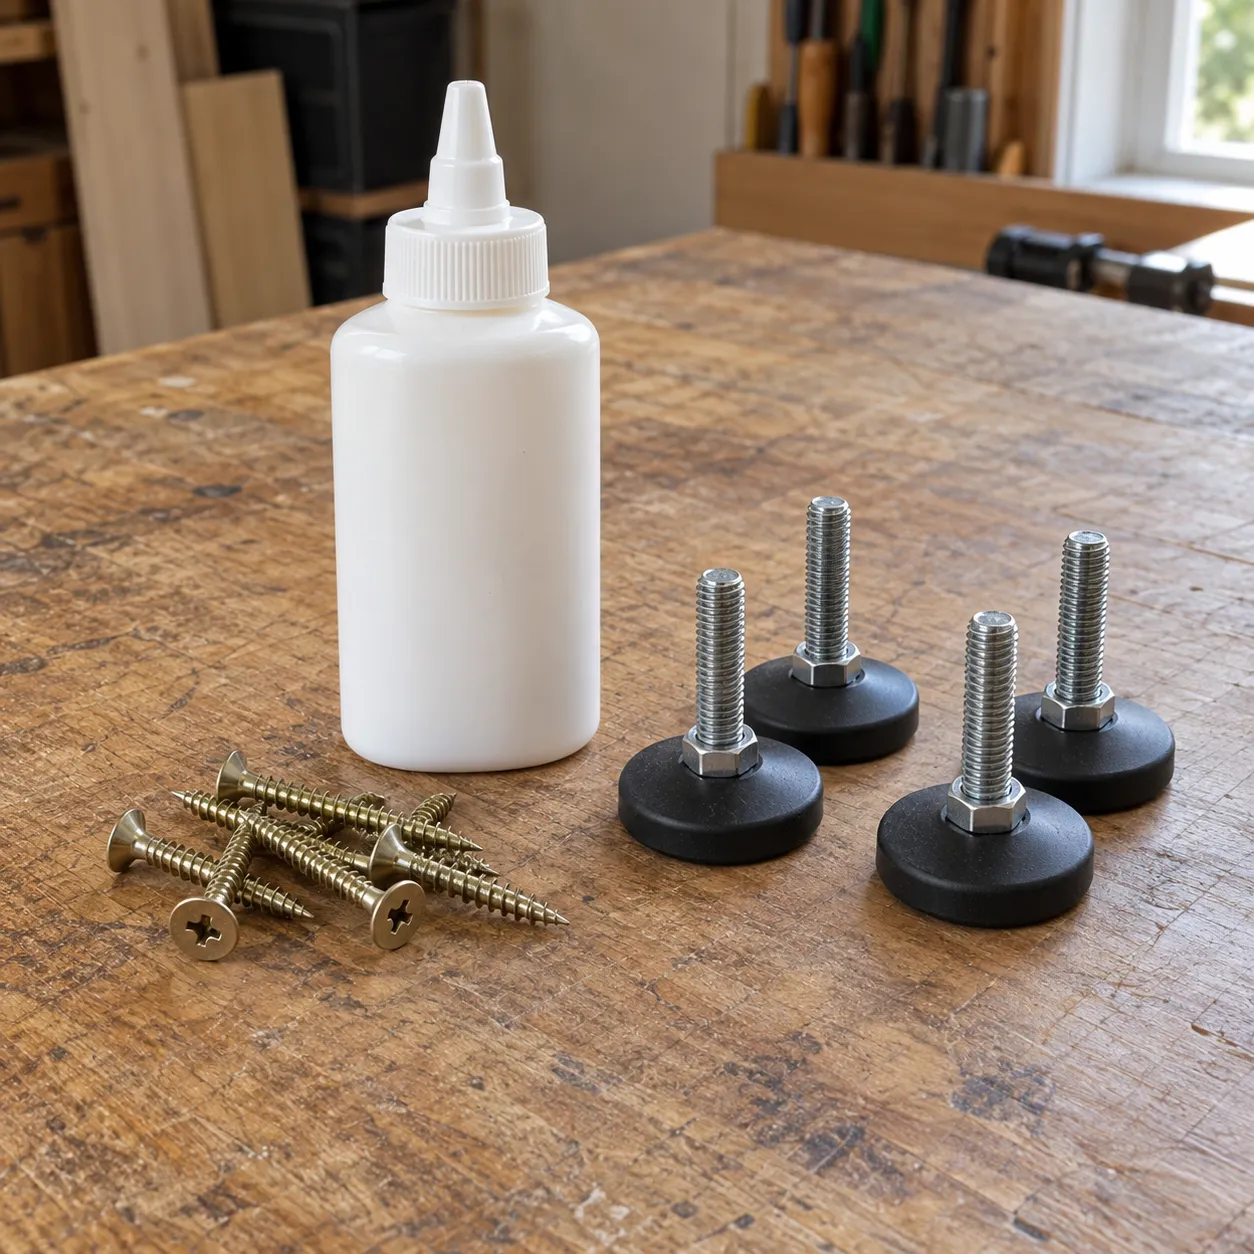
Screws: You'll need 220-240 #8 × 1-1/2" (3.8 cm) wood screws in total. Make sure they're flat head — at some points you'll need to countersink the head into the panel, and a round head would sit proud of the surface there. Stores usually sell these by the box, and a box may be more than you need; buying them loose from a local hardware shop works out cheaper.
Glue: Not required, but I recommend it — particularly on the center post's 45° joints and where the shelf holders seat against the post. The screws make the connection; the glue keeps small movements from developing over time. Ordinary wood glue (PVA) is plenty — this is an indoor project, so there's no need to step up to a waterproof grade.
If you plan to take it apart for storage, be careful with the glue: if you intend to demount the stand at the end of the season, do not use any glue on the shelf holders or where the shelves seat onto them — a glued joint can't be separated again without damaging the parts. In that case, use glue only on the center post's own 45° joints; the post never comes apart under any scenario.
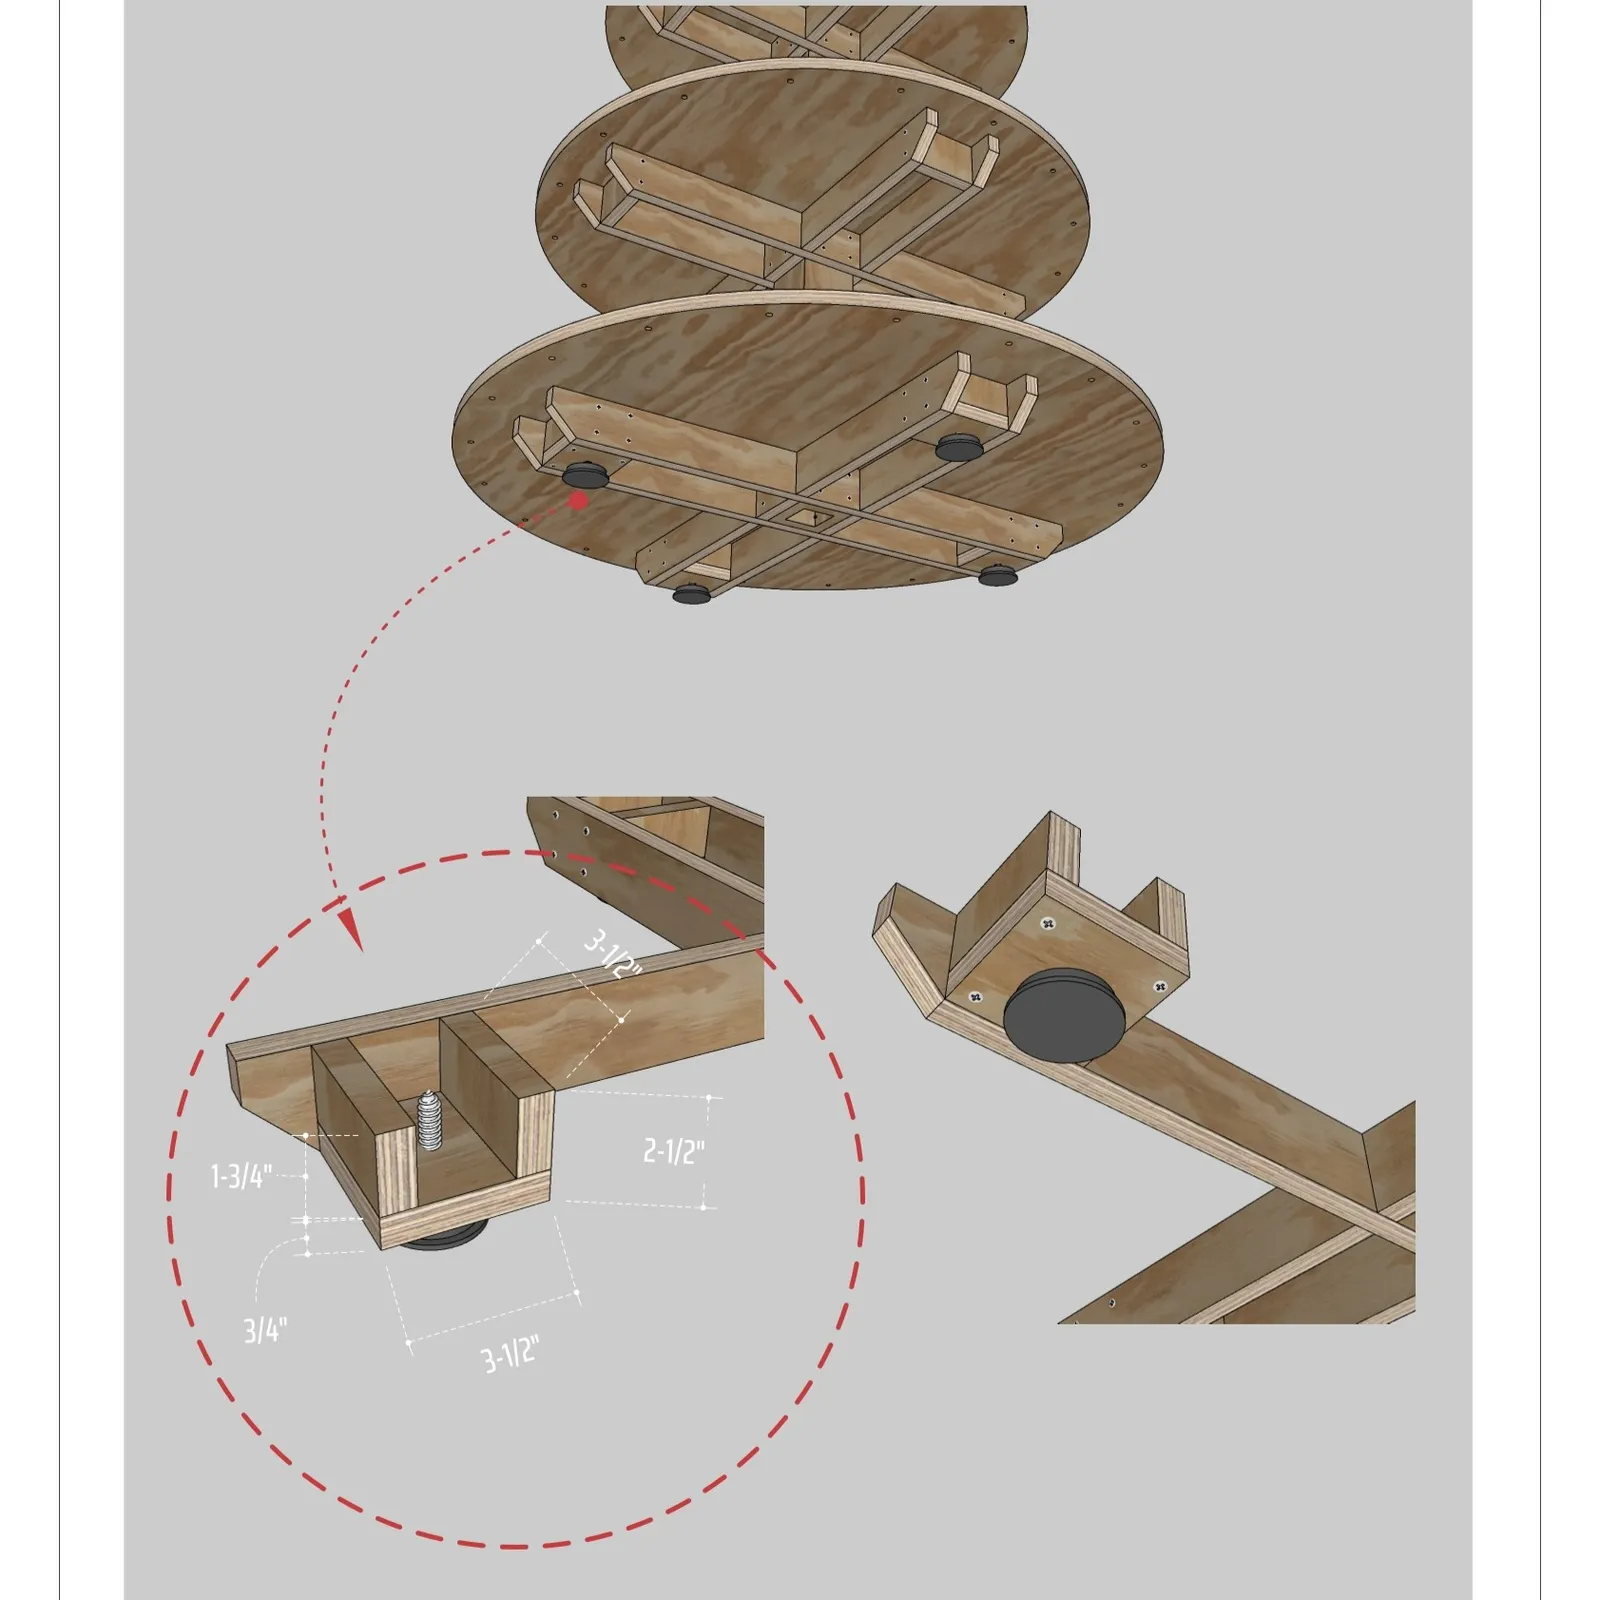
Adjustable feet: 4 threaded-stem furniture leveling glides. The product I referenced in the guide is a round-based model, 1-1/16" (2.7 cm) across. They thread into the foot blocks under the bottom shelf and let you level the stand if the floor slopes. Don't skip these unless your floors are genuinely flat: on a structure about 7 ft (2 m) tall, a slope you can't even see at floor level turns into a visible lean by the top tier.
You may want to stick felt pads under the feet to protect a wood floor. If the glides you buy already have a plastic or rubber base, you can skip that — those bases won't scratch the floor and give enough grip on their own.
This project is designed for indoors, so there's no need for exterior paint. But the choice is less open than it looks — let me get the most common mistake out of the way first.
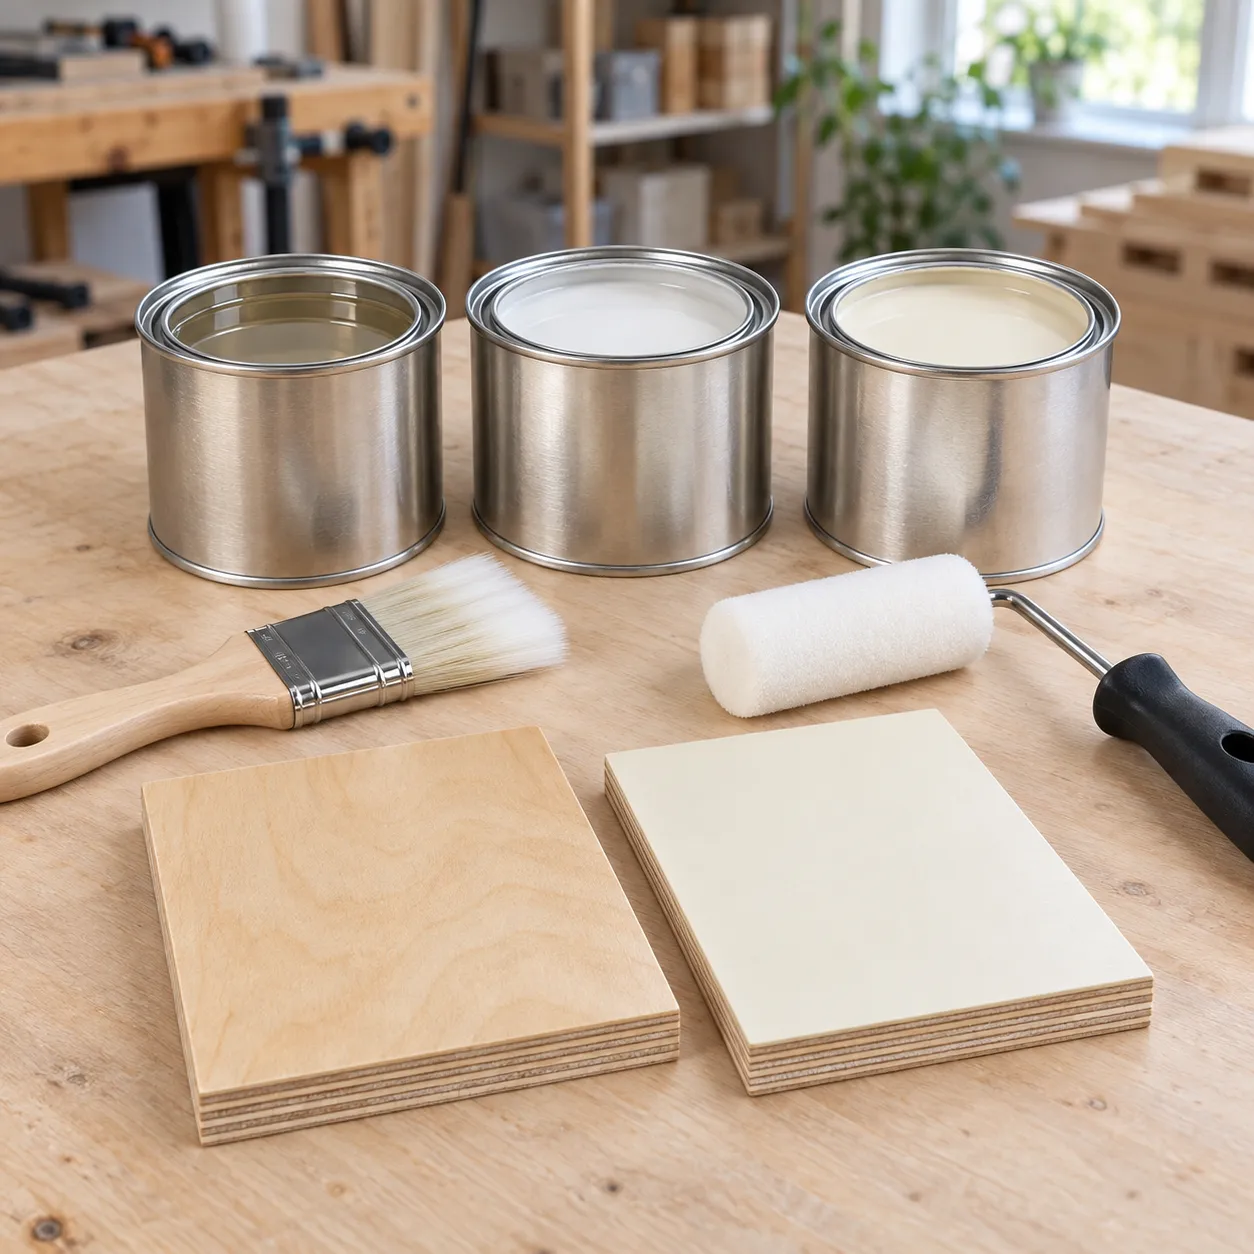
Don't use wall paint. Emulsion, latex and other interior wall paints are formulated for walls; they aren't made to stand up to contact and abrasion. On a furniture surface the film stays soft, and it marks and stains as you set pieces down and pick them up again. The product category you want is wood/furniture paint.
For a natural wood look (clear finish): if you used birch plywood, you can skip paint entirely — that's how the look in the reference photos is achieved.
- Water-based polyurethane is the right call on a pale wood like birch; it dries clear and doesn't change the color of the wood.
- I don't recommend oil-based polyurethane: it's durable, but it ambers over time and spoils birch's clean, light tone.
- As an alternative, a hardwax oil (e.g. Osmo Polyx) gives a natural matte finish with the advantage that scratches can be spot-repaired later.
- Matte or satin sheen suits it best. Two thin coats is usually enough; scuff lightly with 220 grit between coats.
For a painted finish:
- Primer: a water-based wood primer or multi-surface primer. Primer matters even more with MDF: its cut edges are spongy and drink up paint. Give the edges two coats with a sand in between; a shellac-based primer (e.g. Zinsser B-I-N) is the most reliable solution for this.
- Topcoat: water-based acrylic wood/furniture paint. On labels this is sold as trim & cabinet paint, furniture paint, or acrylic enamel. Two thin coats is enough.
- Sheen: choose satin or semi-gloss. Flat sheens mark easily and don't take cleaning; full gloss highlights every small imperfection in the surface.
- White and cream tones are a common choice because they push the village houses and ornaments forward visually.
Quantity: counting both faces of the six shelves plus the post and holders, you're looking at roughly 48-54 sq ft (4.5-5 m²) of surface — which a single quart each of primer and paint generally covers.
Whichever route you take, painting before assembly makes the job dramatically easier — with the parts still separate you can reach every surface. Painting after assembly turns into fussy work, especially between the holders underneath each shelf.
There are two ways to build this, and which one you pick depends on what you have access to.
- CNC / laser cutting — Hand the DWG, DXF, or SVG file straight to a CNC shop. It's the fastest and most accurate route, particularly for getting all six circles perfectly round with their center openings properly aligned. The decorating holes get cut in the same pass.
- Cutting by hand with a jigsaw — Transfer the cut list's dimensions onto the panel yourself and cut them out. Since every part is a circle or a rectangle, this project takes to hand-cutting quite well; there's no complex silhouette to follow.
If you're cutting by hand, this trick makes the circles much easier: mark the center point on the panel, drive a screw there, and pivot the jigsaw around it on a straight batten fixed to that screw — the distance from the screw to the blade along that batten is the circle's radius. Doing the same job with a trim router and a circle-cutting jig gives an even cleaner edge.
To cut the 3-1/2" (8.9 cm) square opening in the middle of a shelf by hand: drill a hole in each corner of the square and start the jigsaw blade from those holes.
Whichever method you use, take care that the center openings really are centered on all six shelves — it's the tightest tolerance in this project.
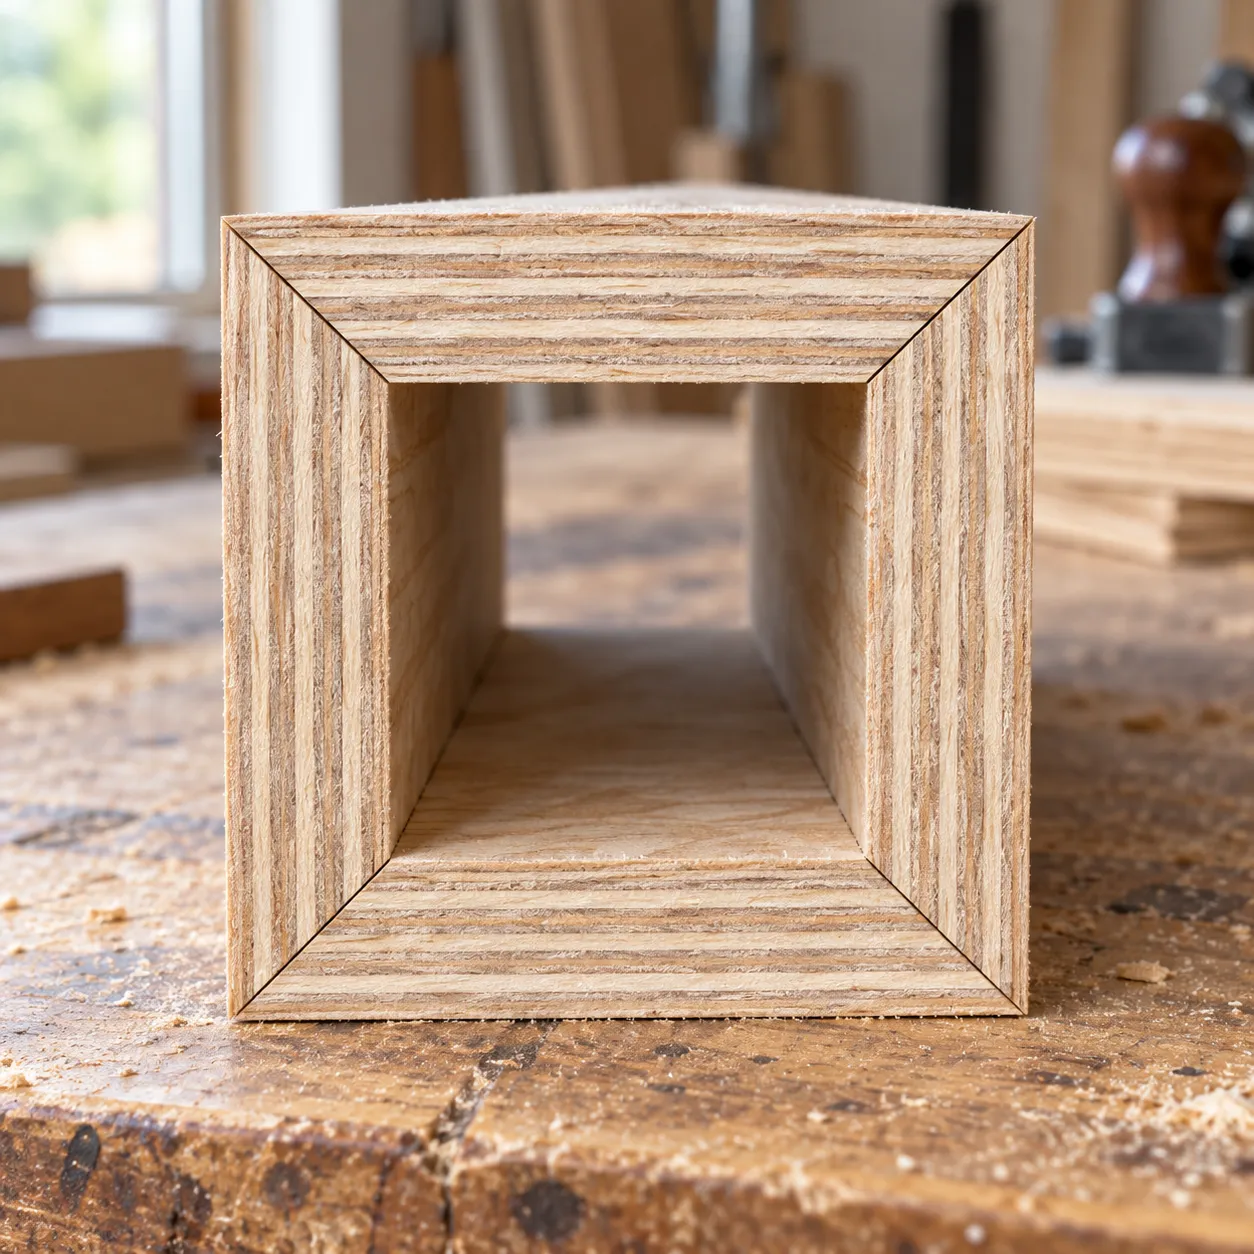
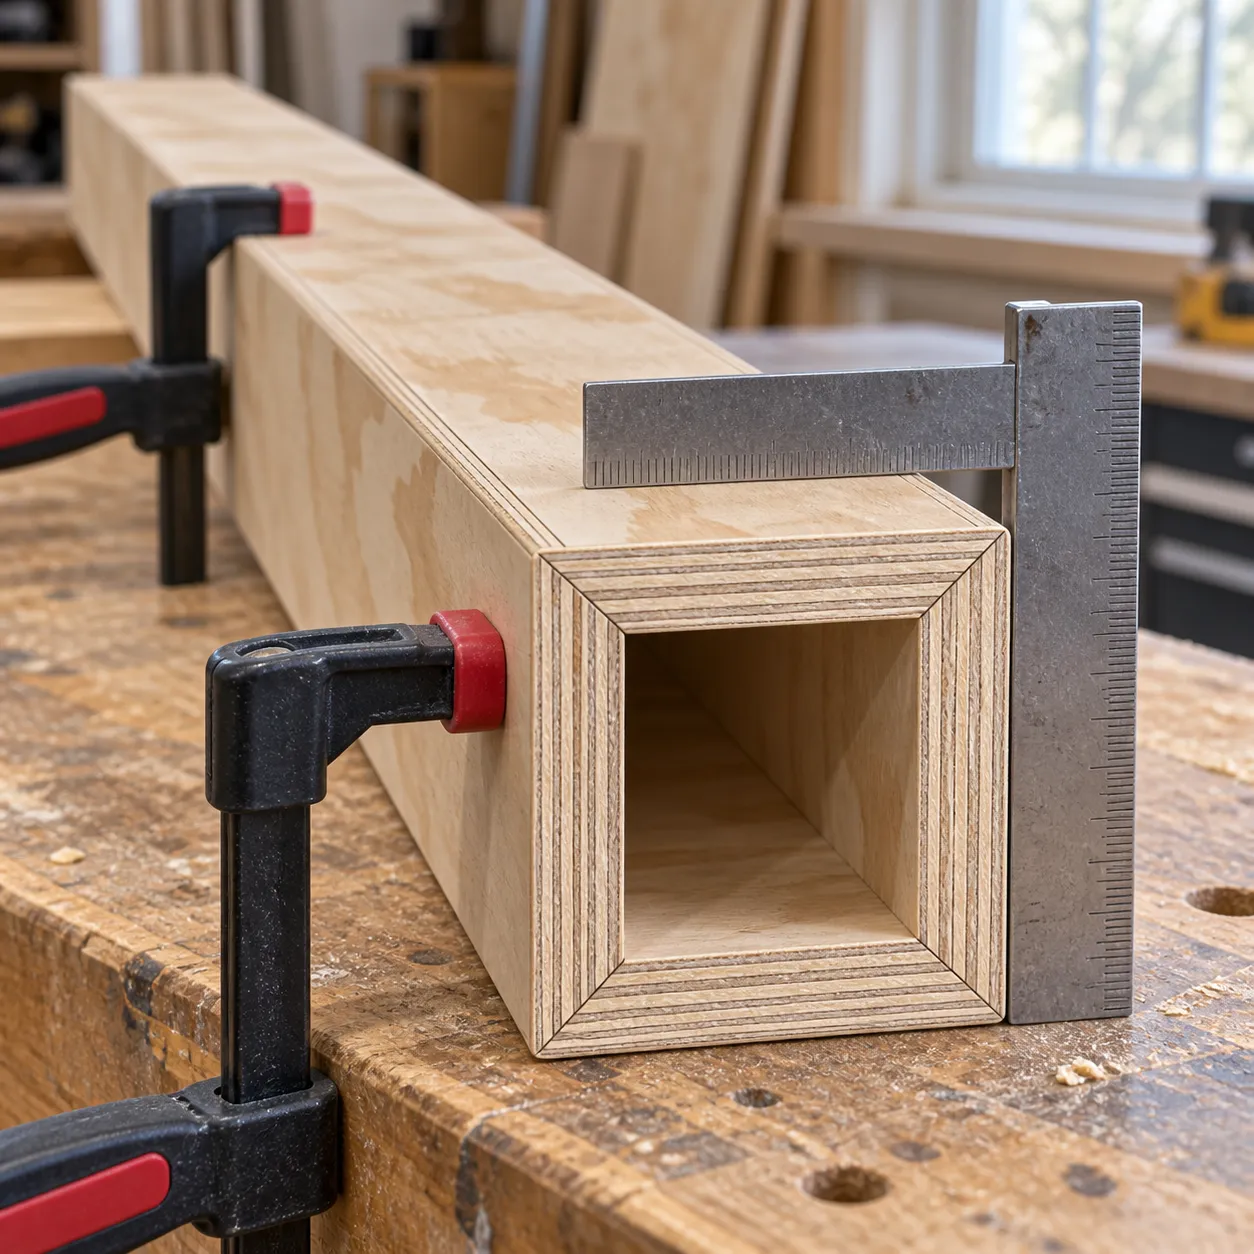
The center post is a hollow square column, made by joining four 3-1/2" (8.9 cm) wide strips along their long edges at 45°. Those miters are what make the post's four corners read as a single clean piece from the outside.
You need to tell the CNC shop about this before they cut. CNC and laser machines cut square to the panel; the parts will arrive with square edges. If you don't have a table saw or miter saw at home to put that bevel on yourself, you have to specifically ask the shop to bevel the long edges of those four strips at 45°. Realizing this after the parts are already in your hands makes the job harder.
The 45° joint isn't mandatory, though: you can also join the four strips square, overlapping them at the corners. The post comes out just as strong — the only difference is that the plywood's layered edge stays visible at the corners. If you're painting, that difference all but disappears; if you're leaving the wood natural, the mitered version looks visibly cleaner.
Joining the four strips along their 45° edges gives you a hollow square column, 3-1/2" × 3-1/2" (8.9 × 8.9 cm). Run glue along the edges, line them up, then screw them together.
Don't put those screws just anywhere — place them at the heights where the shelf holders will land. Once the holders seat against the post, they cover those screws, so no fasteners are left visible on the post's outer faces. You'll find the holder heights on the section page of the guide.
Check for square at every stage as you build the post — on a column about 7 ft (2 m) long, a small twist shows up as a clear lean by the upper shelves. Working against a long flat reference (the edge of a bench, or a flat floor) is the easiest way to keep it true.
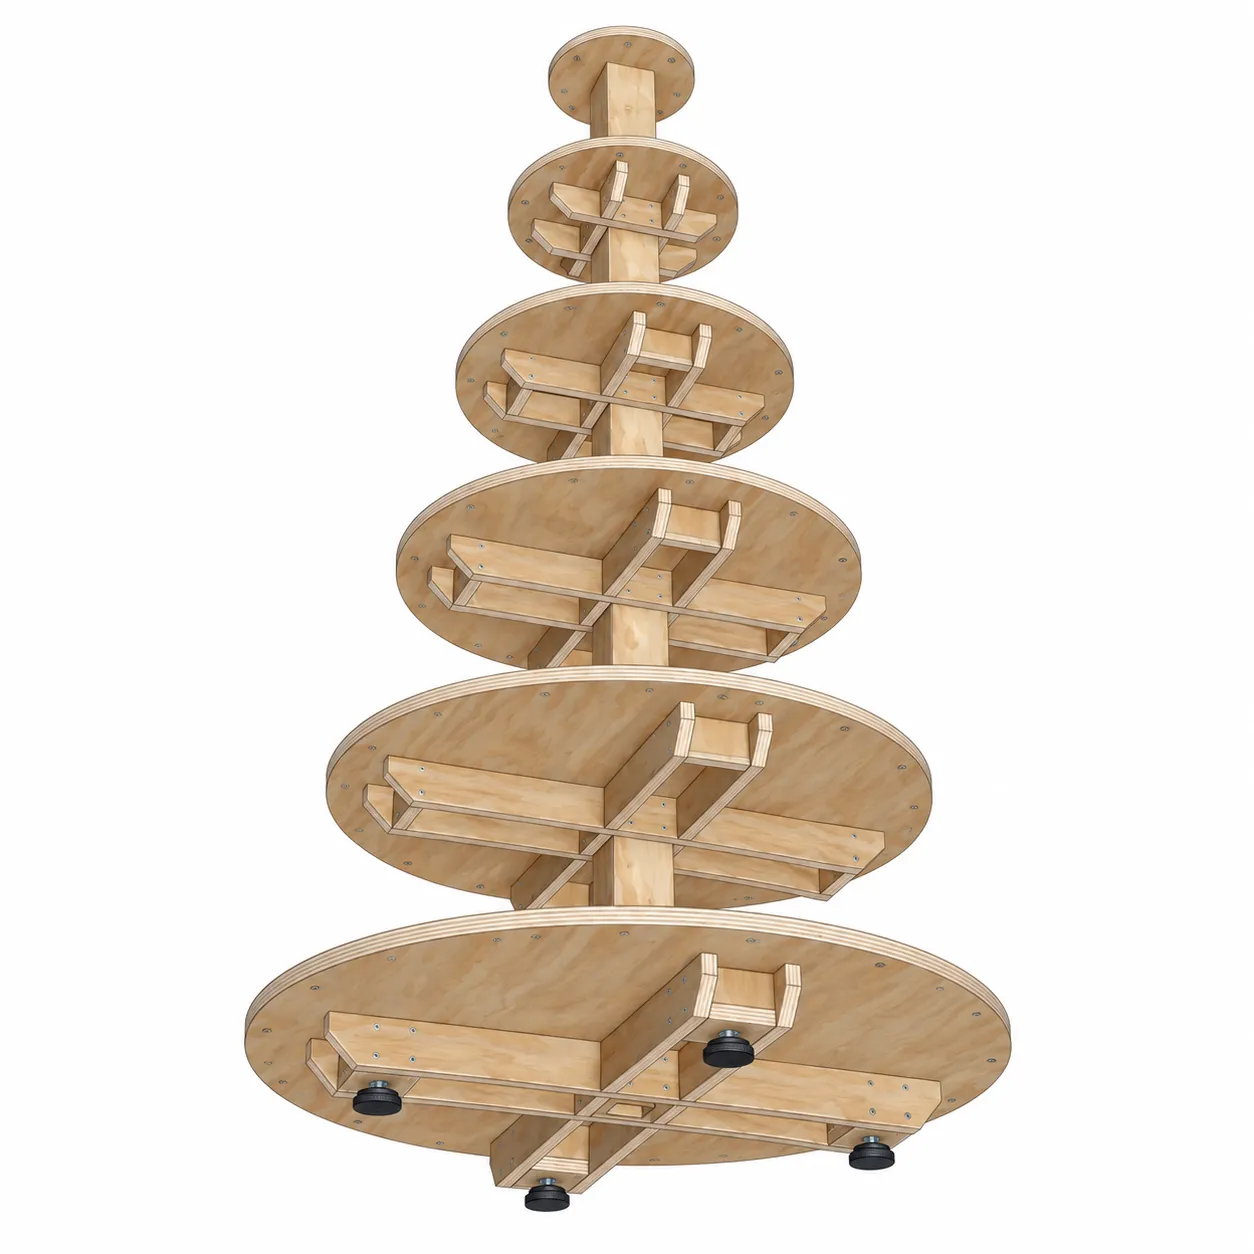
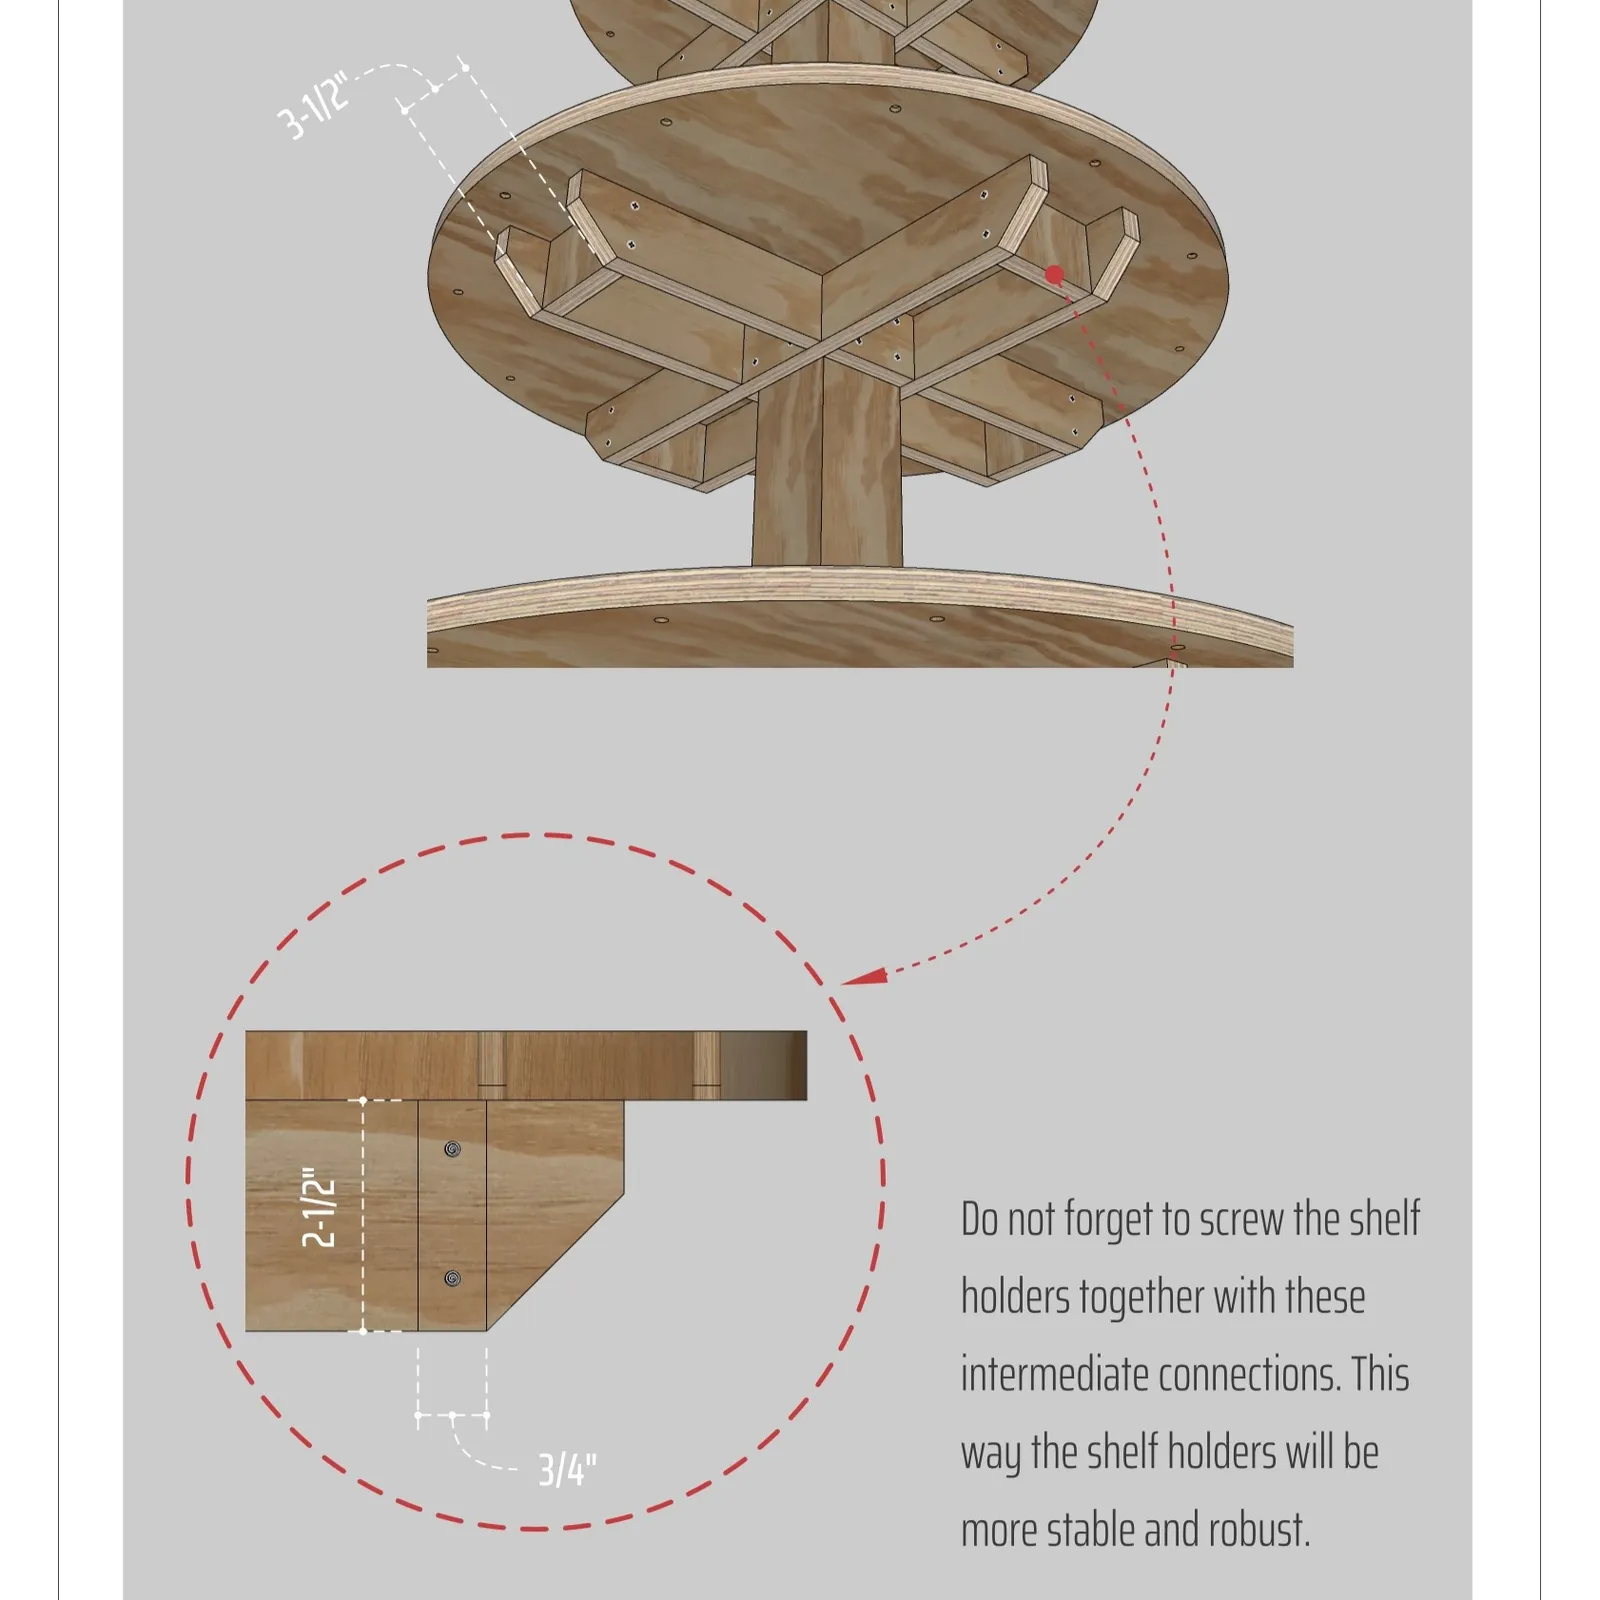
Each shelf rests on four holders that key into the post. The holders sit on the post's four faces at the heights given in the section plan, and the joint cut into their ends grips the post. That joint detail is identical on every holder — only the lengths differ, since each level carries a different diameter shelf.
Working bottom to top is the easiest assembly order:
- Fit the holders — seat that level's four holders into their places on the post, glue them, and screw them down. Make sure all four are at the same height and level; if even one sits a couple of millimeters high, the shelf rides up on that side.
- Screw in the interconnections — don't skip the small pieces that tie each level's four holders to one another. On their own, the holders can flex where they meet the post; the interconnections turn all four into a single frame and stiffen the level noticeably.
- Drop the shelf on — slide the shelf down over the post and onto the holders. The square opening should seat cleanly; if you have to force it down, widening the opening by a millimeter or two beats forcing the panel and cracking it.
- Screw the shelf down — fasten it to the holders from above. Countersinking the heads slightly keeps the top surface smooth so nothing catches when you're arranging pieces on it.
The top 10" (25.4 cm) shelf has no center opening — it caps the post and gets screwed down from above.
Under the bottom shelf you screw on the pieces that make up the foot blocks, and the adjustable glides thread into those blocks. The blocks also hold the bottom shelf about 1-3/4" (4.5 cm) off the floor — which keeps the shelf from sitting directly on the ground and makes it easier to clean underneath.
To level it: once the stand is in place, set a spirit level on the bottom shelf and check two perpendicular directions, then raise or lower the glides by turning them. Once it reads level both ways, the post stands plumb on its own.
Do this while the stand is empty — once the village is arranged on it, the feet are harder to reach, and any adjustment that needs the stand tipped slightly means clearing everything off again.
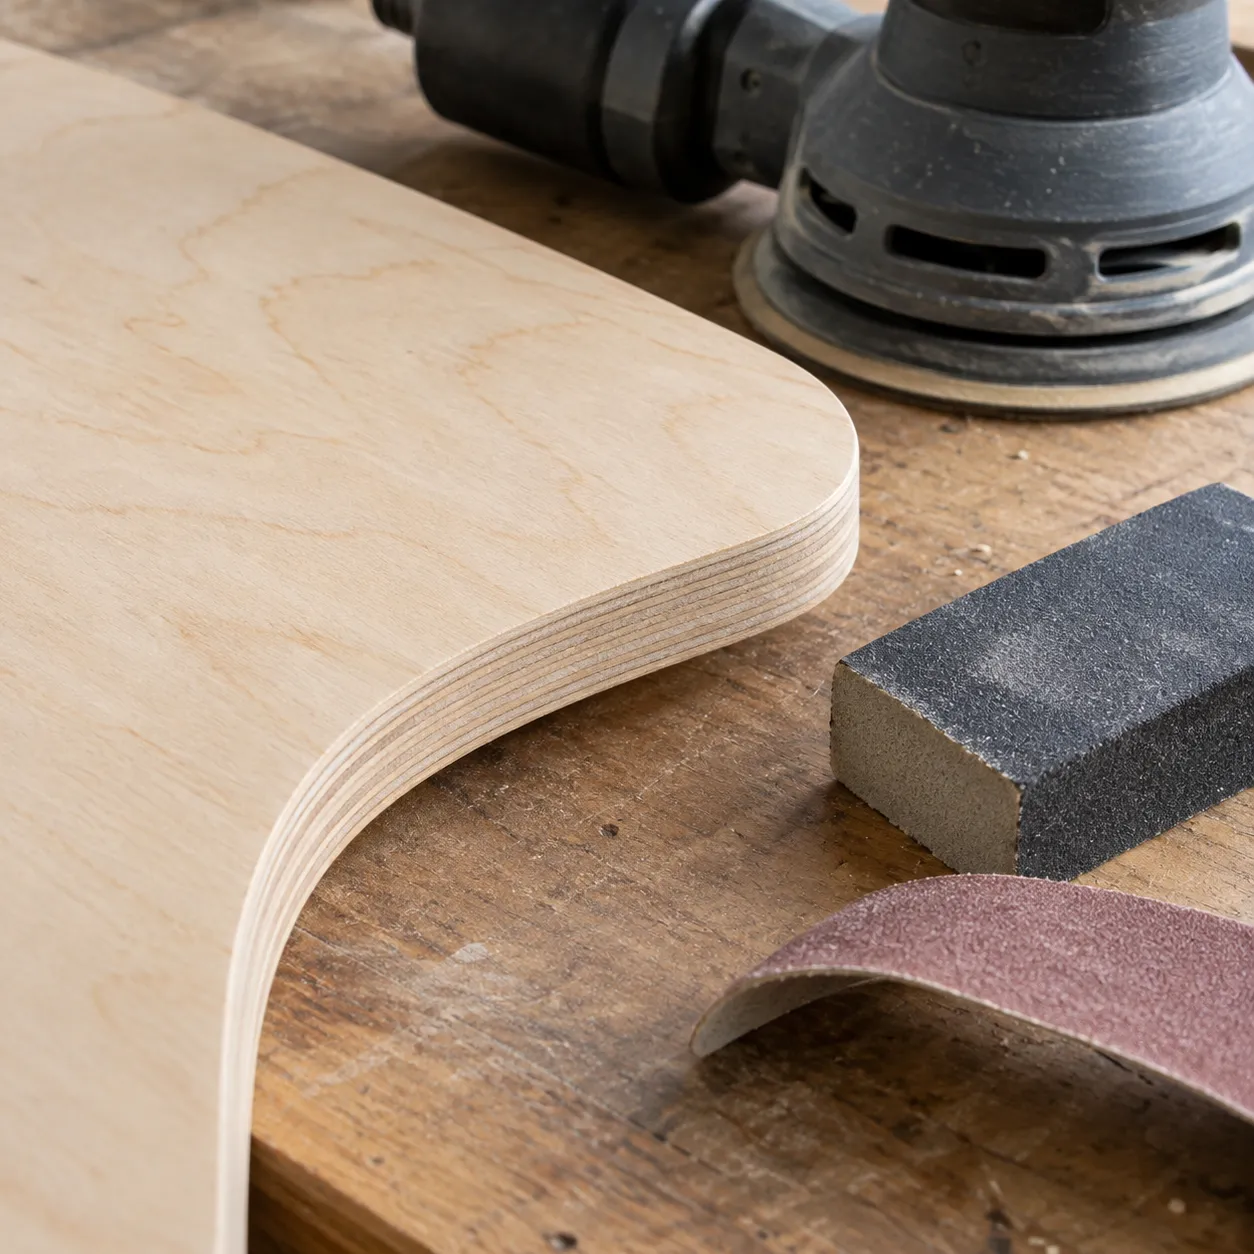
Once the cutting is done, sand every part. Start with 80-120 grit on the edges and any rough spots, then move to 150-220 grit for a smooth, paint-ready surface. A random orbital sander speeds things up on the broad flat faces; the circular edges come out better sanded by hand, where you have more control.
Pay particular attention to the edges on this project, since they stay completely exposed — the outer rim of each shelf is the surface the eye lands on most once it's finished.
Edge banding: Worth considering if you're leaving the wood natural. Covering the plywood's layered edge with thin iron-on birch edge banding makes the shelves read as if they were cut from solid timber. The six shelves come to roughly 40 ft (12 m) of perimeter in total — a standard roll usually covers it. If you're painting, you can skip this.
Sanding and painting before assembly, while the parts are still separate, makes the whole job significantly easier.
There are 5/16" (8 mm) holes about 1" (2.5 cm) in from the edge of every shelf. They're not a structural part of the design — they're purely there to make decorating easier.
A few ways to use them:
- Garland: Wrap green garland around the shelf's rim and secure it with a zip tie or thin wire passed through the holes. That's how the look in the reference photos is put together.
- Hanging ornaments: Small baubles and figures can hang from these holes over the edge of the shelf — which leaves the shelf surface itself free for the village.
- Screw eyes: If you expect to swap decorations often, fitting a screw eye into each hole is more practical; you hang things on the ring instead of threading them through the hole every time.
The number and spacing of the holes is left open — the top-view drawing in the guide shows a reference layout, but you can add or leave out holes to match how densely you like to decorate.
One practical note on arranging the village: putting the larger structures (churches, stations, multi-story buildings) on the lower shelves and working down in size as you go up both looks more balanced and keeps the weight low.
This is an indoor project, so there's no need to get into outdoor LED strips, IP ratings or transformer math — a box marked indoor is all you need.
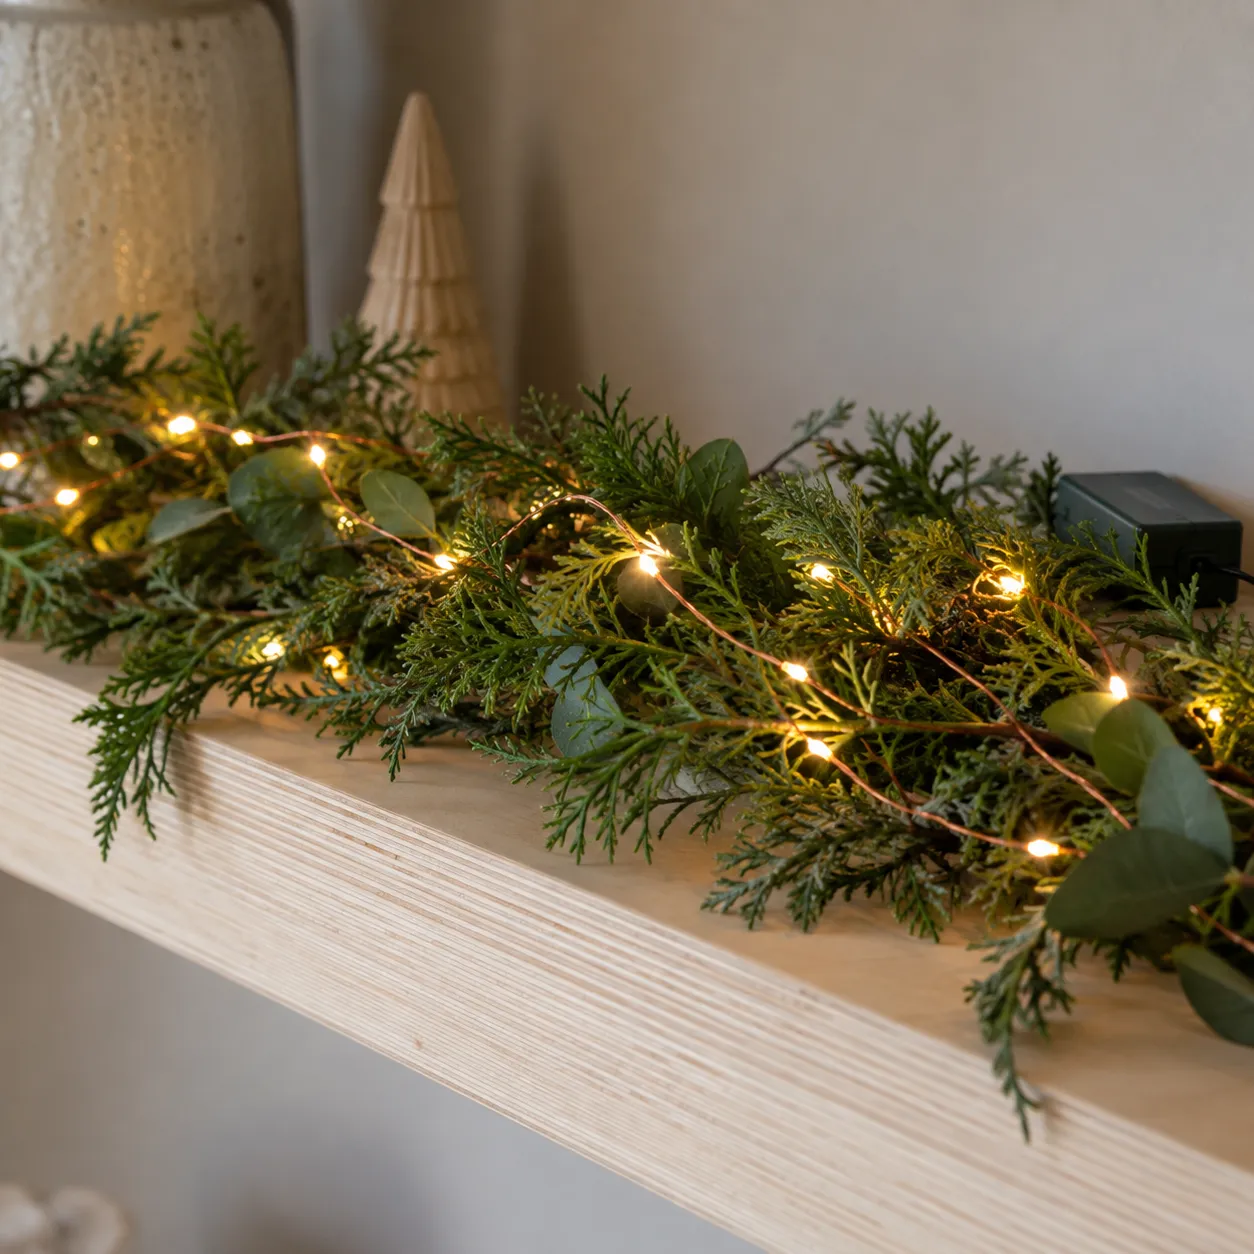
What kind of lights: thin-wire LED string lights give the most natural result. They're sold as copper wire fairy lights, micro LED string lights, or sometimes seed lights — searching any of those terms gets you exactly the right product. The fine copper or silver wire disappears among the garland and shelves, so what you see is the light rather than the light source.
For color temperature, choose warm white (2700-3000K) — cool white reads bluish and clashes with both the wood and the village houses. If you'd rather have a more traditional look with visible bulbs, ordinary LED string lights work too; that type has a thicker cord, so it's a little harder to hide.
Length: if you're running them around all six shelves, a 30-60 ft (10-20 m) set covers it comfortably.
Battery or plug-in: Battery sets are very practical on a stand like this since there's no cord to route — particularly on the upper tiers. Models with a built-in timer also save you switching them on and off every evening. If you use a plug-in set, a single cord running down the post is all you need.
Hiding the cord: Run the cord down one face of the center post and hold it with clear cable clips and it becomes nearly invisible. Where a cord has to cross a shelf, you can pass it through a corner of that shelf's center opening — there's already a small gap between the post and the shelf there.
Lit village pieces: If the houses in your set (Dept. 56, Lemax, and similar) are individually lit, you may need a power strip per shelf. In that case, gathering the cords along the back of each shelf — the side facing the wall — gives the cleanest result; none of it shows from the front.
You don't need to worry about this stand's load capacity. It's built on a noticeably more robust logic than most of the alternatives that do the same job — and it's worth explaining why, because it's this design's most important quality.
The load goes into keyed joints, not into screws. Each shelf rests on four separate holders that grip the post through a joint cut into their ends — not on a bracket simply screwed to the post's face. The screws hold the parts together; the joint itself carries the load. On a shelf held by screws alone, the entire load sits on the screws' shear strength; here it transfers straight into the post.
Each level becomes a closed frame. The interconnection pieces tie that level's four holders to one another, turning four supports that could each flex on their own into a single frame. The load on a level is shared across all four holders.
The post is a hollow box section. The square column formed by joining four strips resists bending and twisting far better than a solid stick made from the same amount of material. Closed box sections are used in engineering for exactly this reason.
The center of gravity is already low. The widest, heaviest shelf is at the bottom and the panels get smaller as they go up. Add the 40" (101.6 cm) base diameter, and you get a wide, well-proportioned footprint relative to the 81-1/4" (206 cm) height.
So the question isn't whether the shelves will carry the weight — they will. The suggestions below aren't about the structure's strength; they're about protecting your collection if something unexpected happens:
Put heavy and fragile pieces on the lower shelves. A porcelain church or a ceramic building that tips over on the bottom shelf is far less likely to be damaged than one falling from an upper tier. If you have a cat or dog in the house, or you live somewhere with earthquake risk, this one placement choice reduces the potential damage to a minimum in practice. The same logic works visually: large structures low, small ones high, reads as better balanced anyway.
Don't skip leveling. A structure about 7 ft (2 m) tall standing on a sloped floor will lean into that slope under its own weight, even when the slope is too slight to see. That's a matter of geometry, not weakness, and the adjustable feet solve it in minutes.
In earthquake-prone regions, or if there are small children in the house, I'd secure the stand with a wall anchor — the thin steel cable and wall plug from a furniture anti-tip kit are made exactly for this. No tall free-standing furniture stays put in an earthquake on its own; that's a shared reality of tall furniture, not a shortcoming of this build. A single tie from the upper part of the post to the wall is enough, and it doesn't show from the front.
When choosing a spot, avoid placing it directly in front of a radiator, fireplace, or other heat source — plywood loses moisture over time in that position and can move slightly.
This design goes together with screws as a fixed structure — meaning it doesn't come apart back into flat panels on its own at the end of the season. If you want it to, you need to make one small change during assembly.
Storing it assembled: If you're putting it away as-is, the most practical approach is to lay it on its side and wrap it in a blanket or moving pad. It takes up roughly a cylinder 3 ft (1 m) across and 7 ft (2 m) long — reasonable for a corner of a garage or an attic, but large for inside a closet.
Making it demountable: If you use bolts and nuts instead of screws where the shelves fasten to the holders (or fit those screws without glue, so they only hold the shelf), you can take all six shelves off at the end of the season. What's left is just the post and holder frame, with the shelves stacking flat — a significant reduction in the space it takes. If you go this route, don't skip the glue warning — a glued joint can't be taken apart. The change is hard to make later, so if storage space is tight, decide before you start assembly.
Whichever route you take, store the shelves flat and dry, ideally lying horizontally. Plywood left leaning on one edge for a long stretch — especially somewhere damp — can take on a slight cup.
There's no separate printable template for hand-cutting on this project, so the print-scale-percentage trick that works for my flat decor projects doesn't apply here. Rescaling the CNC files in CAD software is technically possible, but unlike a flat silhouette, this is a load-bearing structure — the panel thickness (3/4" / 19 mm), screw lengths, and shelf-holder joints are all sized to the dimensions I give. If you want a different size, message me on Etsy before rescaling anything yourself — we can work out together which measurements actually need to change.
Yes — this is a standard, platform-wide Etsy feature. The download link doesn't expire; you can re-access your files anytime from the "Purchases and Reviews" page in your Etsy account, with no limit on how many times you download.
Of course — I make every plan myself, and you're welcome to reach out to me directly through Etsy with any question, before or after your purchase. I stand behind every design I share.
No — these files are for personal use only. Selling what you make from them, or using the design or files for any other commercial purpose, isn't included in this purchase.
I don't offer refunds once the files have been downloaded — this is standard practice given the nature of digital goods. That said, if you run into an actual problem with the files (won't open, something's missing), reach out and I'll help sort it out.
Please select a heading above to see the project details.
Other Christmas Village Stands Projects

Illuminated Pine-Tree Pattern, 6 ft. Corner Christmas Village Tree Stand CNC Files and Assembly Plans (3 Shelves)

Plain-Panel, 6 ft. Corner Christmas Village Tree Stand CNC Files and Assembly Plans (3 Shelves)
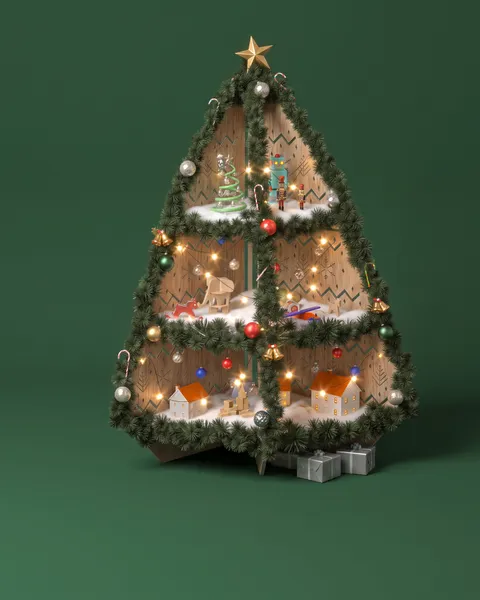
Scandinavian Snowflake Knit-Pattern, 6 ft. Corner Christmas Village Tree Stand CNC Files and Assembly Plans (3 Shelves)
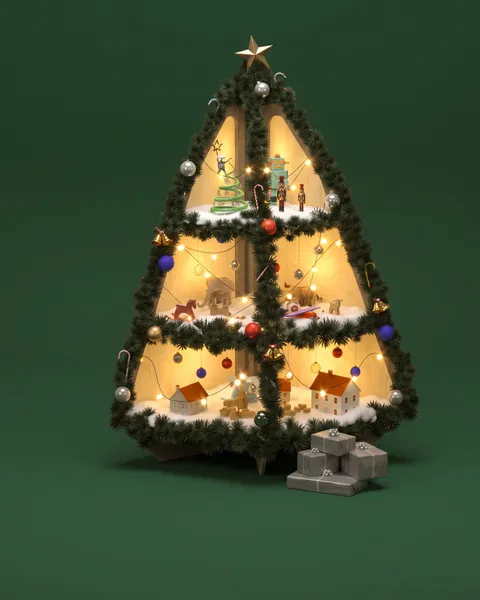
Fully-Illuminated, 6 ft. Corner Christmas Village Tree Stand CNC Files and Assembly Plans (3 Shelves)

Christmas Pattern, 6 ft. Corner Christmas Village Tree Stand CNC Files and Assembly Plans (3 Shelves)
Illuminated Pine-Tree Pattern, 6 ft. Corner Christmas Village Tree Stand CNC Files and Assembly Plans (3 Shelves)
Plain-Panel, 6 ft. Corner Christmas Village Tree Stand CNC Files and Assembly Plans (3 Shelves)
Scandinavian Snowflake Knit-Pattern, 6 ft. Corner Christmas Village Tree Stand CNC Files and Assembly Plans (3 Shelves)
Fully-Illuminated, 6 ft. Corner Christmas Village Tree Stand CNC Files and Assembly Plans (3 Shelves)